On this page
如何部署到 Google Cloud Run
Google Cloud Run 是一个托管计算平台,允许您在 Google 可扩展的基础设施上运行容器。
本如何做指南将向您展示如何使用 Docker 将您的 Deno 应用程序部署到 Google Cloud Run。
首先,我们将向您展示如何手动部署,然后我们将展示如何使用 GitHub Actions 自动化部署。
先决条件:
- Google Cloud Platform 账户
- 已安装
dockerCLI - 已安装
gcloud
手动部署 Jump to heading
创建 Dockerfile 和 docker-compose.yml Jump to heading
为了集中关注部署,我们的应用程序将简单地为一个返回字符串的 main.ts 文件作为 HTTP 响应:
import { Application } from "jsr:@oak/oak";

const app = new Application();

app.use((ctx) => {
  ctx.response.body = "Hello from Deno and Google Cloud Run!";
});

await app.listen({ port: 8000 });
然后,我们将创建两个文件——Dockerfile 和 docker-compose.yml——用于构建 Docker 镜像。
在我们的 Dockerfile 中,添加:
FROM denoland/deno

EXPOSE 8000

WORKDIR /app

ADD . /app

RUN deno install --entrypoint main.ts

CMD ["run", "--allow-net", "main.ts"]
然后,在我们的 docker-compose.yml 中:
version: "3"

services:
  web:
    build: .
    container_name: deno-container
    image: deno-image
    ports:
      - "8000:8000"
我们通过运行 docker compose -f docker-compose.yml build 接着 docker compose up,并访问 localhost:8000 来进行本地测试。
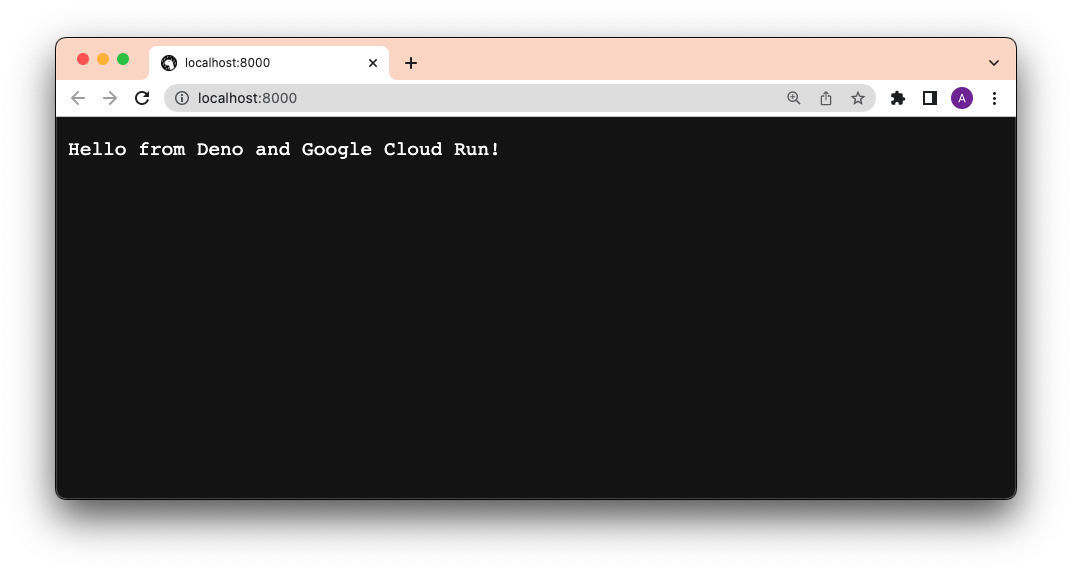
它成功了!
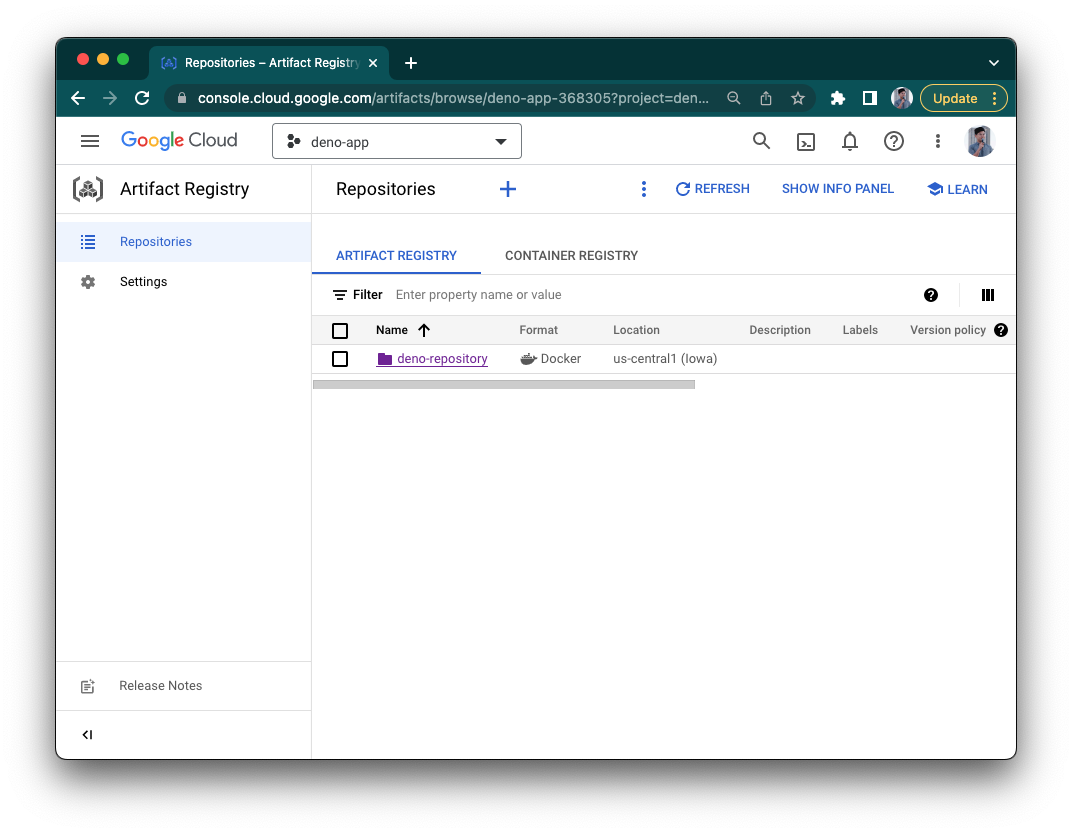
设置 Artifact Registry Jump to heading
Artifact Registry 是 GCP 的 Docker 镜像私有注册中心。
在我们可以使用它之前,请访问 GCP 的 Artifact Registry 并点击 "创建存储库"。您将被要求输入一个名称(deno-repository)和区域(us-central1)。然后点击 "创建"。
构建、标记并推送到 Artifact Registry Jump to heading
一旦我们创建了一个存储库,我们就可以开始向其推送镜像。
首先,让我们将注册表地址添加到 gcloud:
gcloud auth configure-docker us-central1-docker.pkg.dev
然后,让我们构建您的 Docker 镜像。(请注意,镜像名称在我们的 docker-compose.yml 文件中定义。)
docker compose -f docker-compose.yml build
然后,用新的 Google Artifact Registry 地址、存储库和名称标记它。镜像名称应遵循以下结构:
{{ location }}-docker.pkg.dev/{{ google_cloudrun_project_name }}/{{ repository }}/{{ image }}。
docker tag deno-image us-central1-docker.pkg.dev/deno-app-368305/deno-repository/deno-cloudrun-image
如果不指定标签,它将默认使用 :latest。
接下来,推送镜像:
docker push us-central1-docker.pkg.dev/deno-app-368305/deno-repository/deno-cloudrun-image
有关如何推送和拉取镜像到 Google Artifact Registry 的更多信息。
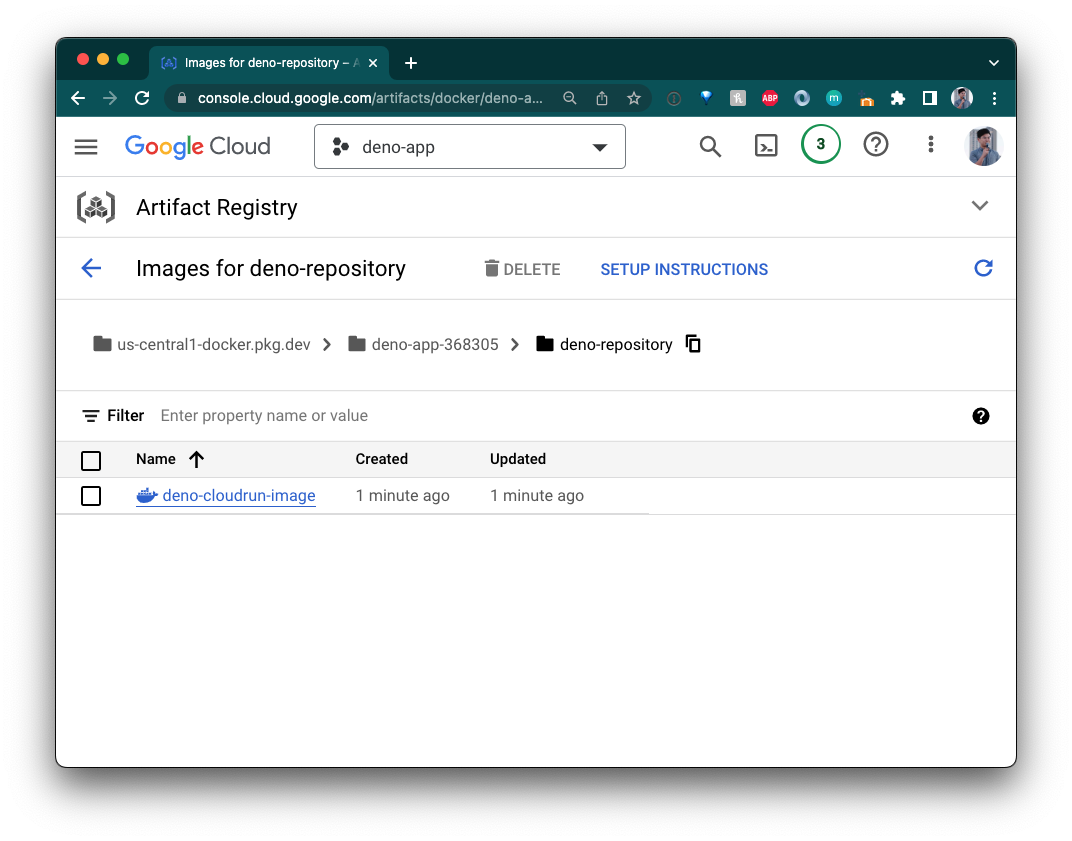
您的镜像现在应该出现在您的 Google Artifact Registry 中!
创建 Google Cloud Run 服务 Jump to heading
我们需要一个实例来构建这些镜像,因此让我们访问 Google Cloud Run 并点击 "创建服务"。
让我们将其命名为 "hello-from-deno"。
选择 "从现有容器镜像部署一个修订版本"。使用下拉菜单选择来自 deno-repository Artifact Registry 的镜像。
选择 "允许未经身份验证的请求",然后点击 "创建服务"。确保端口为 8000。
完成后,您的应用程序现在应该是在线的:
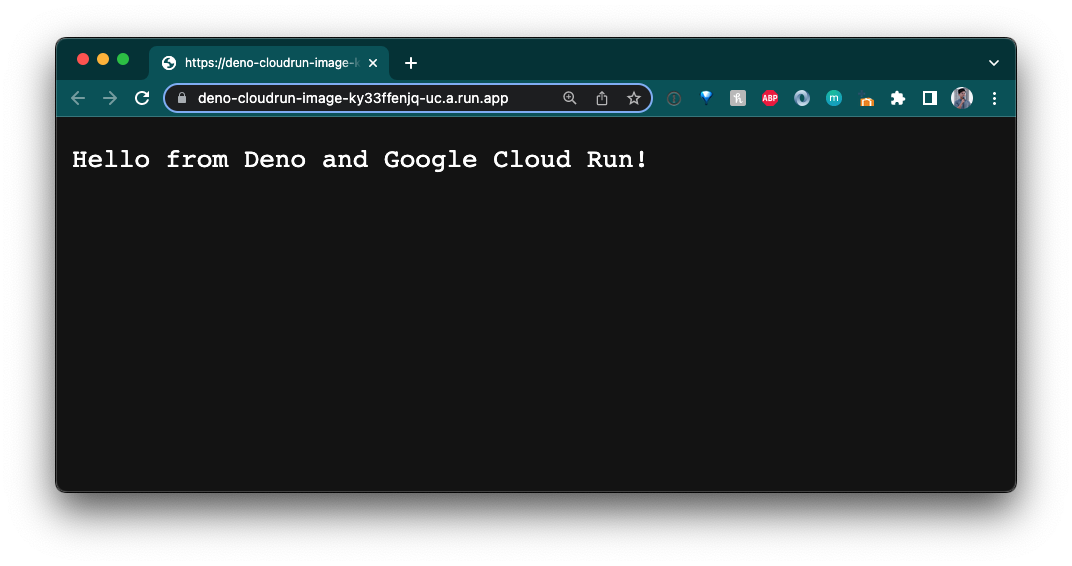
太棒了!
使用 gcloud 部署 Jump to heading
现在它已经创建,我们将能够从 gcloud CLI 部署到此服务。命令的结构如下:
gcloud run deploy {{ service_name }} --image={{ image }} --region={{ region }} --allow-unauthenticated。
请注意,image 名称遵循上面的结构。
在本示例中,命令为:
gcloud run deploy hello-from-deno --image=us-central1-docker.pkg.dev/deno-app-368305/deno-repository/deno-cloudrun-image --region=us-central1 --allow-unauthenticated
成功!
使用 GitHub Actions 自动化部署 Jump to heading
为了使自动化工作,我们首先需要确保这两个已经创建:
- Google Artifact Registry
- Google Cloud Run 服务实例
(如果您还没有做到这一点,请参见之前的部分。)
现在我们完成了,可以通过 GitHub 工作流自动化部署。以下是 yaml 文件:
name: Build and Deploy to Cloud Run

on:
  push:
    branches:
      - main

env:
  PROJECT_ID: { { PROJECT_ID } }
  GAR_LOCATION: { { GAR_LOCATION } }
  REPOSITORY: { { GAR_REPOSITORY } }
  SERVICE: { { SERVICE } }
  REGION: { { REGION } }

jobs:
  deploy:
    name: Deploy
    permissions:
      contents: "read"
      id-token: "write"

    runs-on: ubuntu-latest
    steps:
      - name: Checkout
        uses: actions/checkout@v4

      - name: Google Auth
        id: auth
        uses: "google-github-actions/auth@v0"
        with:
          credentials_json: "${{ secrets.GCP_CREDENTIALS }}"

      - name: Login to GAR
        uses: docker/login-action@v2.1.0
        with:
          registry: ${{ env.GAR_LOCATION }}-docker.pkg.dev
          username: _json_key
          password: ${{ secrets.GCP_CREDENTIALS }}

      - name: Build and Push Container
        run: |-
          docker build -t "${{ env.GAR_LOCATION }}-docker.pkg.dev/${{ env.PROJECT_ID }}/${{ env.REPOSITORY }}/${{ env.SERVICE }}:${{ github.sha }}" ./
          docker push "${{ env.GAR_LOCATION }}-docker.pkg.dev/${{ env.PROJECT_ID }}/${{ env.REPOSITORY }}/${{ env.SERVICE }}:${{ github.sha }}"

      - name: Deploy to Cloud Run
        id: deploy
        uses: google-github-actions/deploy-cloudrun@v0
        with:
          service: ${{ env.SERVICE }}
          region: ${{ env.REGION }}
          image: ${{ env.GAR_LOCATION }}-docker.pkg.dev/${{ env.PROJECT_ID }}/${{ env.REPOSITORY }}/${{ env.SERVICE }}:${{ github.sha }}

      - name: Show Output
        run: echo ${{ steps.deploy.outputs.url }}
我们需要设置的环境变量是(括号中的示例是本存储库的):
PROJECT_ID: 您的项目 ID(deno-app-368305)GAR_LOCATION: 您的 Google Artifact Registry 的位置(us-central1)GAR_REPOSITORY: 您为 Google Artifact Registry 指定的名称(deno-repository)SERVICE: Google Cloud Run 服务的名称(hello-from-deno)REGION: 您的 Google Cloud Run 服务的区域(us-central1)
我们需要设置的秘密变量是:
GCP_CREDENTIALS: 这是 服务账户 的 json 密钥。创建服务账户时,请确保 包括必要的角色和权限 以便用于 Artifact Registry 和 Google Cloud Run。